

WordPress makes it easy to add images to your blog posts and pages. However, to make these images look good, you should choose the right image size. That’s exactly what we’re going to talk about today: WordPress image sizes.
It’s important to know how image sizes work on WordPress websites and how you can add custom image sizes to your website. Then you can use the most suitable image file type in the right size and in the right place.
The right image size not only makes your website look more coherent, it also makes your blog posts easier to share. You can find out how to use the right image sizes for your WordPress website in this article.
We deal with the following topics:
- How WordPress manages the images you upload
- How to change and edit the size of images in WordPress
- The best image sizes for WordPress
- Best practices for WordPress image sizes
- How to add custom WordPress image sizes
- Conclusion on WordPress image sizes and general best practices
How WordPress manages the images you upload
As already mentioned, the image size is important with WordPress. If you choose the wrong size, your images will look blurred. Worse still, if your images are too large, they can slow down your website.
Incorrect image sizes can also mess up the layout of your page or blog post and cause unnecessary side scrolling. The good news: WordPress has an integrated setting that you can use to avoid these problems.
WordPress image sizes
- Thumbnail size: 150 x 150 pixels
- Average size: 300 x 300 pixels
- Largest size: 1024 x 1024 pixels
- Full size: corresponds to the original size of the uploaded image by default.
When you upload an image to WordPress, these four different image sizes are created by default.
There are two reasons why WordPress creates these image sizes. Firstly, you don’t have to manually adjust the size of the images. Secondly, it ensures that the right image size is selected for different places on your website.
For example, WordPress displays the thumbnail images in a blog post list in a sidebar or a footer widget. However, an image that is to appear in the header area or in the post itself must be larger. WordPress therefore selects one of the larger image sizes to ensure that the image can be clearly recognised.
So if you want to use the same image in different places on your website, you don’t have to waste time manually changing the size or memorising which image size you need. Simply upload an image – WordPress will take care of the rest.
Content marketing for advanced users: The 6 most important levers
Discover how to optimize your content marketing to reach the right audience, build trust, and achieve long-term success.
How to change and edit the size of images in WordPress
With WordPress, you can change the size of the default images within WordPress. You only need a few clicks and you can set the image sizes in no time at all.
To change the default image sizes, go to Settings > Media. As you can see on the screenshot, all standard image sizes are listed there. You can easily customise them by entering your preferred dimensions.
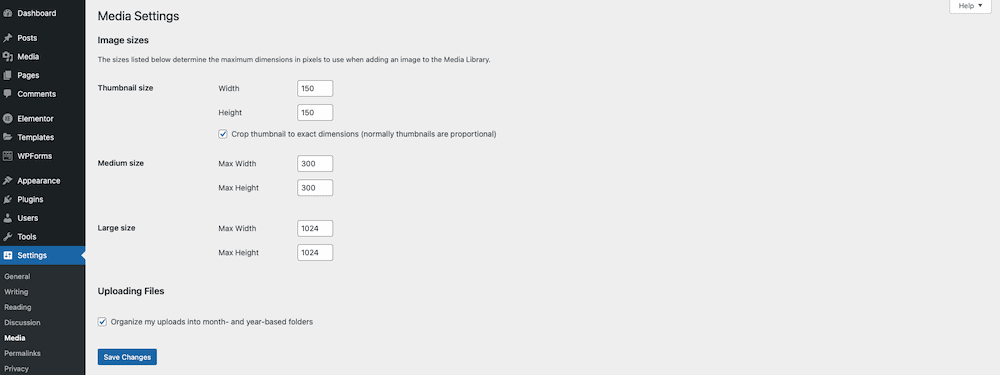
Once you have adjusted the standard sizes of the WordPress images to your preferred dimensions, click on Save changes. In future, all images that you upload to your website will be adjusted to the new dimensions.
When you should change the default sizes of WordPress images
There are a few situations where you may need to change the default WordPress image sizes. For example, if you’ve purchased a WordPress theme that uses custom image sizes and want to ensure that WordPress resizes your uploaded images to fit those dimensions.
Another example is creatives who need certain image sizes to showcase their work. Changing the standard image sizes may also be necessary if you have an online shop and need certain image sizes for your product images.
Best practices for WordPress image sizes
In addition to the correct image sizes, there are a few other best practices for WordPress image sizes.
Optimise the file size of images
Images are often one of the main causes of slow loading times. If your image files are too large, your target group will have to wait a long time until the browser has downloaded them and they are visible.
So before you upload photos to your website, you should reduce their file size. In general, you should aim for a file size of 150 KB or less when it comes to images. You can reduce the file size by saving the image in a lower quality.
With large photos, such as wallpapers, you need to find a good balance between file size and quality. In other words, you want to reduce the file size but prevent the image from becoming pixelated.
Optimize images for WordPress: The 6 most popular plugins for image compression
You can also use image compression tools. These help you to reduce the file size without affecting the quality. We present “5 plugins for optimizing your images”.
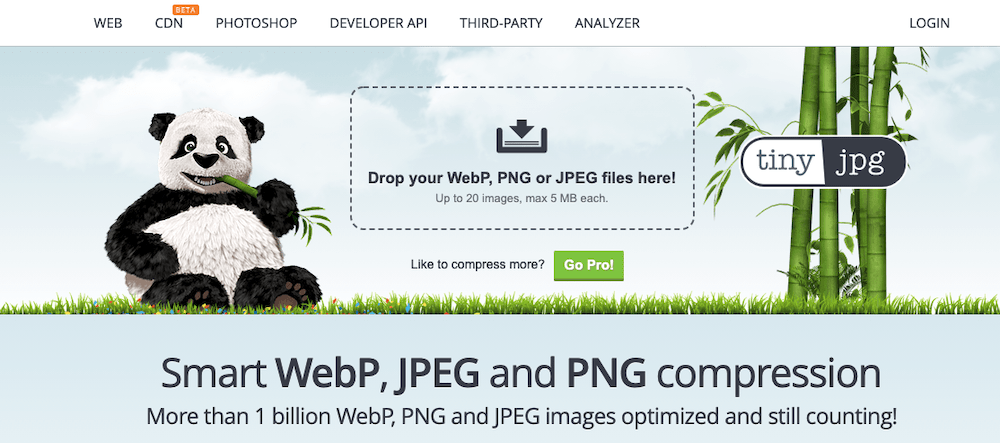
TinyJPG is an online image compression tool that allows you to significantly reduce the size of your images – by up to 70 per cent – without compromising on quality.
You can compress up to 20 images with a size of up to 5 MB at a time for free. You can also sign up for TInyJPG’s Pro plan, which starts at $25/year per user. With the Pro plan, you can compress more than 20 images at a time and remove the 5 MB size limit for WordPress images.
TinyJPG is a great solution for images that you want to upload to your website. But what about images that are already on your website? This is where a plugin like ShortPixel comes into play.
The plugin helps you to compress images that you have already uploaded to your website. It also processes and compresses all future image uploads. It reduces the file size by up to 75 per cent without any noticeable loss of quality.
You can also use the plugin to convert all JPG, PNG and GIF image formats into the WebP and AVIF formats, which were explicitly developed for the lossless and lossy compression of images on the web and in your media library.
ShortPixel is free for up to 100 images/month. You can purchase additional image credits starting at $4.99 for 7,000 image credits.
Use the correct image type
WordPress allows you to upload images in various formats. As a rule, images are saved as JPG, PNG or GIF. However, each of these formats has its own advantages and disadvantages.
Here is an overview of the different image types :
- JPG (JPEG) stands for Joint Photographic Experts Group. This file type supports 16 million colours and usually has the smallest file size for photos. This file type is ideal for background images, product photos, featured images and generally for all images or photos that you want to use on your website.
- PNG stands for Portable Network Graphic. This image format supports fewer colours than JPG. However, you can use it to save images with a transparent background. It is a good choice for logo images, background patterns, decorative website graphics, social media icons and the like. Images saved as PNG can result in larger files if the image contains a lot of detail.
- GIF stands for Graphics Interchange Format and supports 256 colours and transparency. GIFs can also be animated. GIFs can be small, but they can also lead to larger files if they contain complex animations.
Keep an eye on the image resolution
Another aspect you should consider when optimising images for the web is the image resolution. The image resolution is measured in dots per inch (DPI) and determines the quality of the image. The higher the DPI value, the higher the image resolution.
For web purposes, your image resolution should be set to 72 DPI as this is considered standard. A higher resolution will result in a large size and contribute to your website loading slowly.
Subscribe to the Raidboxes newsletter!
We share the latest WordPress insights, business tips, and more with you once a month.
"*" indicates required fields
How to add custom WordPress image sizes
You can add custom image sizes by editing your functions.php file. Let’s say you want to add a custom image size for your featured image.
To add them to your theme, you just need to do the following:
Go to Appearance > Editor in your WordPress dashboard. Open the functions.php file and search for the following line of code:
add_theme_support( ‘post thumbnails’ );
If it is not there, insert this line and then click on the Update file button. Then add the following line to the functions.php file:
add_image_size( ‘blog featured image’, 1280, 630 );
The line above adds the custom size to your theme and specifies the width and height of the new image size. Update the file to save the changes.
You will then need to update the code in your theme so that it displays the new custom image size that you can select when uploading. This time, open the index.php file and insert the following line of code:
the_post_thumbnail( ‘blog featured image’ );

Then update the file to save the changes. Remember that your custom image size will be overwritten with every theme update if you use the manual method.
We therefore recommend that you use a child theme or add custom image sizes with the Image Regenerate & Select Crop plugin. With this plugin, you can easily register new custom image sizes and regenerate the thumbnails according to the new image sizes.
Conclusion: WordPress image sizes and general best practices
Images help you to tell your story and make it easier for your readers to identify with your posts and arouse their interest.
That’s why it’s important that you choose the right size for your website. The tips in this article will help you determine the right size for your images and add customised WordPress image sizes.
To ensure that your efforts to optimise the image size in WordPress pay off, you should secure your website with reliable hosting. After all, there’s no point in speeding up your website if it’s tied to inferior web hosting.
Try WordPress hosting with Raidboxes to give your website the fast loading times your target audience deserves. You can contact us if you want to learn more about the benefits of managed WordPress hosting.
Your questions about WordPress image sizes
What questions do you have about WordPress image sizes? We look forward to your comments. For more insights on WordPress, web design or online business, follow Raidboxes on Facebook or LinkedIn – or subscribe to our newsletter.
Leave a Reply