

If certain payment methods are missing, this discourages many online shoppers from making purchases on your website. Here’s a guide on how you can get round this with Stripe for WooCommerce.
A survey by Merchant Service Advice found that two-thirds of consumers find it frustrating when e-commerce shops don’t have enough payment methods – and that online merchants lose over £1bn a year as a result.
So if you want to avoid abandoned purchases and increase your shop’s turnover, you should choose a payment method like Stripe that increases the conversion rate.
In this article, you’ll learn why you should use Stripe for WooCommerce and how to set up Stripe for WooCommerce.
WooCommerce Hosting
With WooCommerce hosting, you can launch your own online store quickly and securely and manage it professionally – without any technical hurdles. Check our Raidboxes WooCommerce Hosting now.
What is WooCommerce and why should you use it?
WooCommerce is the world’s most popular plugin for setting up an online shop in WordPress. Although there are many different WordPress plugins with e-commerce functions, it has over 200 million downloads.

With WooCommerce, you enjoy the flexibility that WordPress is known for, especially because it allows you to do the following:
- Customise your shop with plugins and product blocks
- Use WordPress SEO
- Option of over 80 payment methods for your shop, including PayPal, Amazon Pay and Stripe
Whether you sell individual products, services, subscriptions or memberships, WooCommerce has you covered.
Subscribe to the Raidboxes newsletter!
We share the latest WordPress insights, business tips, and more with you once a month.
"*" indicates required fields
What is Stripe?
Stripe is a popular online payment processing platform that allows you to accept numerous payment methods – from credit cards to BNPL (Buy Now, Pay Later) services.
The platform is easy to use and is most suitable for online payments. However, with additional hardware, it can also be used as a point-of-sale (POS) system for on-site payments.

Why use Stripe for WooCommerce?
Stripe offers many advantages, including
- Support for a wide range of payment methods, including credit cards, debit cards, digital wallets and bank transfers
- It can be easily integrated into content management systems (CMS) such as WordPress (and WooCommerce)
- It is compatible with both desktop and mobile websites
- Easily process recurring payments, making it perfect for membership and subscription websites
- It is safe and PCI-compliant
Note before using Stripe for WooCommerce
Before you decide on Stripe for WooCommerce, you should consider the following:
- Available payment methods. Stripe accepts many payment methods, but some countries have a preferred payment method.
In the USA, credit cards in particular may dominate, but a study by Payvision in 2021 found that European customers generally prefer digital wallets to credit cards.
These preferences can vary from country to country. According to the study, German customers favour AmazonPay, for example, while customers in the Netherlands use iDEAL. Asian customers also use digital wallets, but prefer Alipay or GrabPay. Stripe supports IDEAL and Alipay, but these may need to be set up first.
- Transaction fees. The standard fee for credit card processing is 2.9% + $0.30, but can vary by location. If your business has a high volume of sales, you can negotiate and try to get a customised discount.
- time before Stripe transfers the money to your bank account. The time also depends on your country. Stripe usually takes 2-7 days and there may be delays on public holidays.
WordPress hosting management
With our Raidboxes dashboard, you get a seamless, intuitive interface that makes managing your WordPress sites easier, faster, and more efficient. Check it out!
Preparations for setting up Stripe for WooCommerce
The easiest way to set up Stripe for WooCommerce is to use a Stripe plugin. You will need the following to set it up:
- An active WooCommerce shop
- A Stripe account. If you don’t have one yet, simply sign up for a Stripe account
- An SSL certificate. It ensures the security of your online shop and your transactions
- A Stripe plugin. There are several Stripe plugins available in both the WooCommerce extension library and the WordPress plugin directory , but for this guide we will be using the WooCommerce Stripe Payment Gateway plugin.
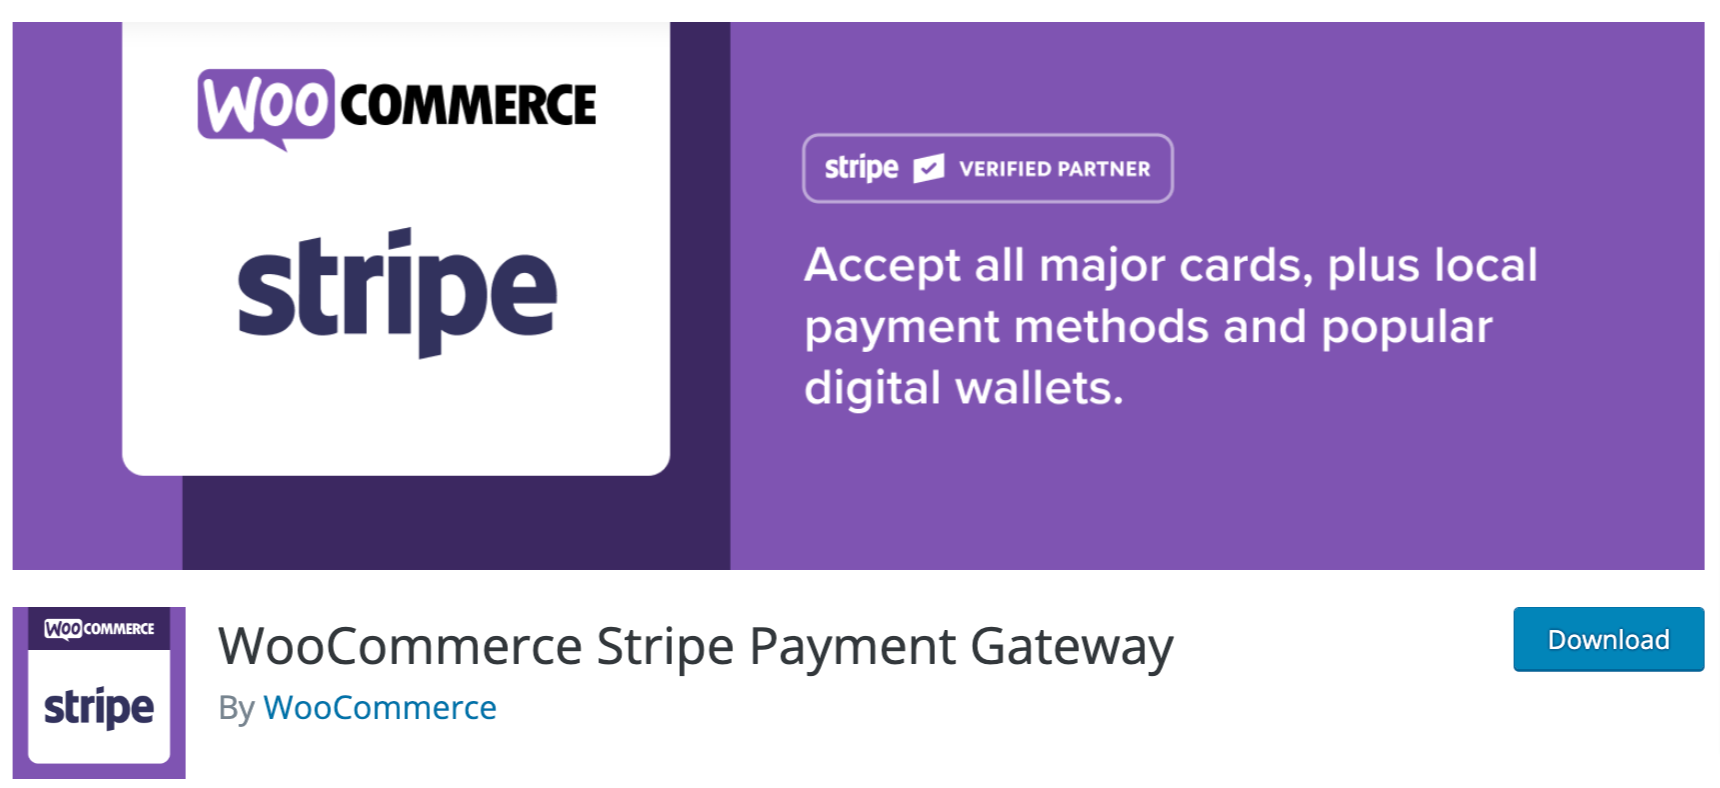
With over 900,000 active installations, the WooCommerce Stripe Payment Gateway plugin is the most popular Stripe plugin for WooCommerce. It enables your WooCommerce shop to accept a variety of payments directly on your website via Stripe’s API.
How to set up Stripe for WooCommerce
- Get the API keys from Stripe
- Install the WooCommerce plugin Stripe Payment Gateway
- Configure the payment settings of WooCommerce
- Test whether Stripe works
Once you’ve considered the requirements listed in the previous section, you can set up Stripe for WooCommerce by following these steps. Let’s take a closer look at how this works.
1. get the API keys from Stripe
The first step is to obtain the Stripe API keys that you will use to integrate the Stripe for WordPress plugin.
Then log in to your Stripe account first.
Then click on Developers on the Stripe Dashboard. This is the purple button at the top right of the page.
Look for the API keys section there. There you will see the Publishable Keys and Test Keys. Copy and save both keys for use in step 3.

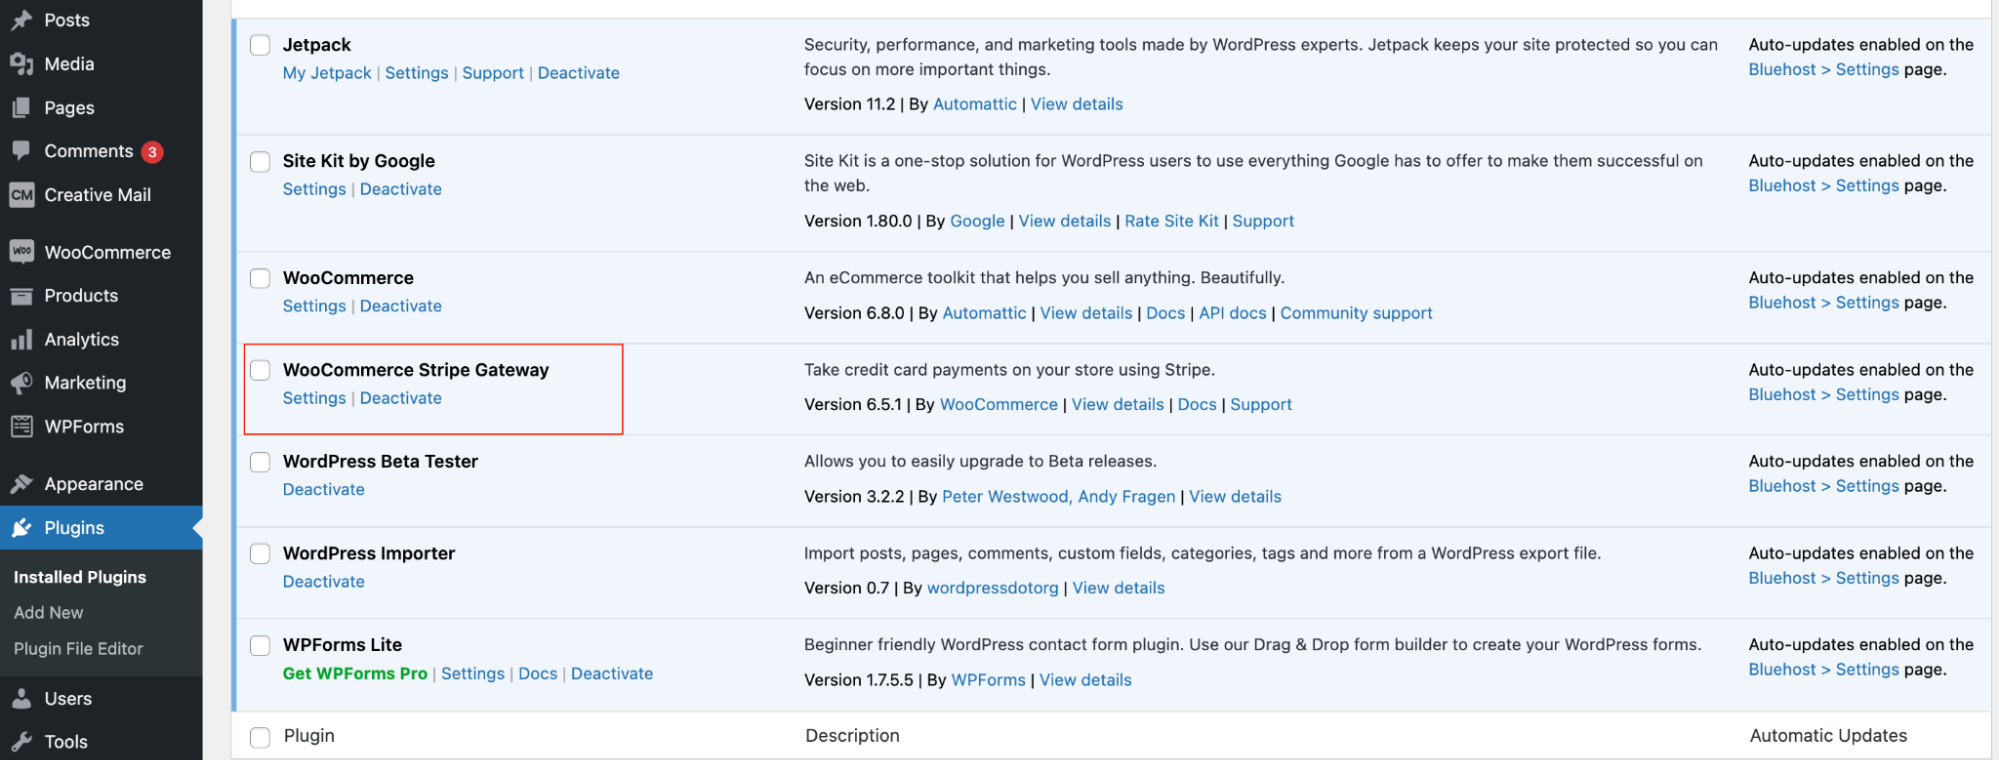
2. install the WooCommerce Stripe Payment Gateway plugin
If you don’t already have it, download the WooCommerce Stripe Payment Gateway plugin from the WordPress plugin directory and activate it.
Once it is activated, go to Settings > WooCommerce Payment Settings.
When you are on the Settings page, go to the Payments tab. There you will see a long list of payment methods that Stripe supports. Then set the switch to the desired (or required) payment method and click on the Finish set up button.
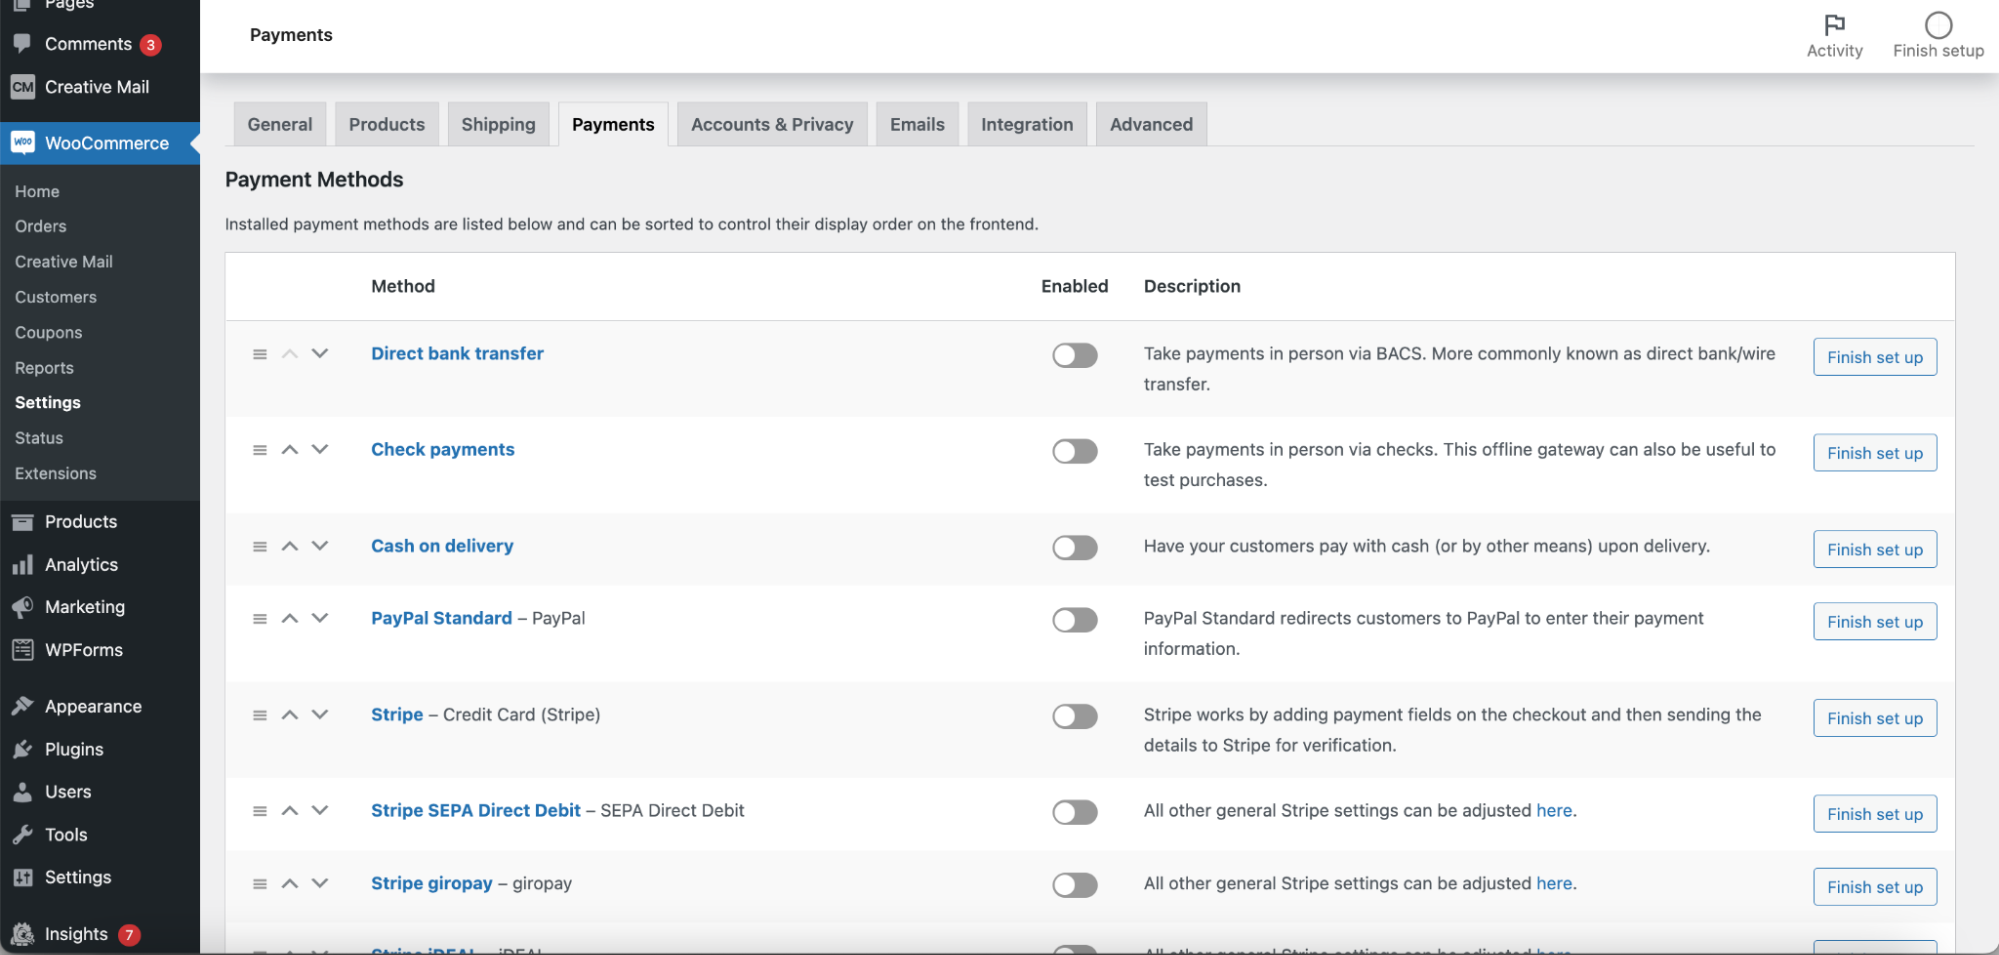
Once you have selected the appropriate payment methods, connect your Stripe account to the plugin.
3. how to configure the WooCommerce payment settings
To establish a connection to Stripe, click on the Settings button of the plugin. You will then be redirected to this page:
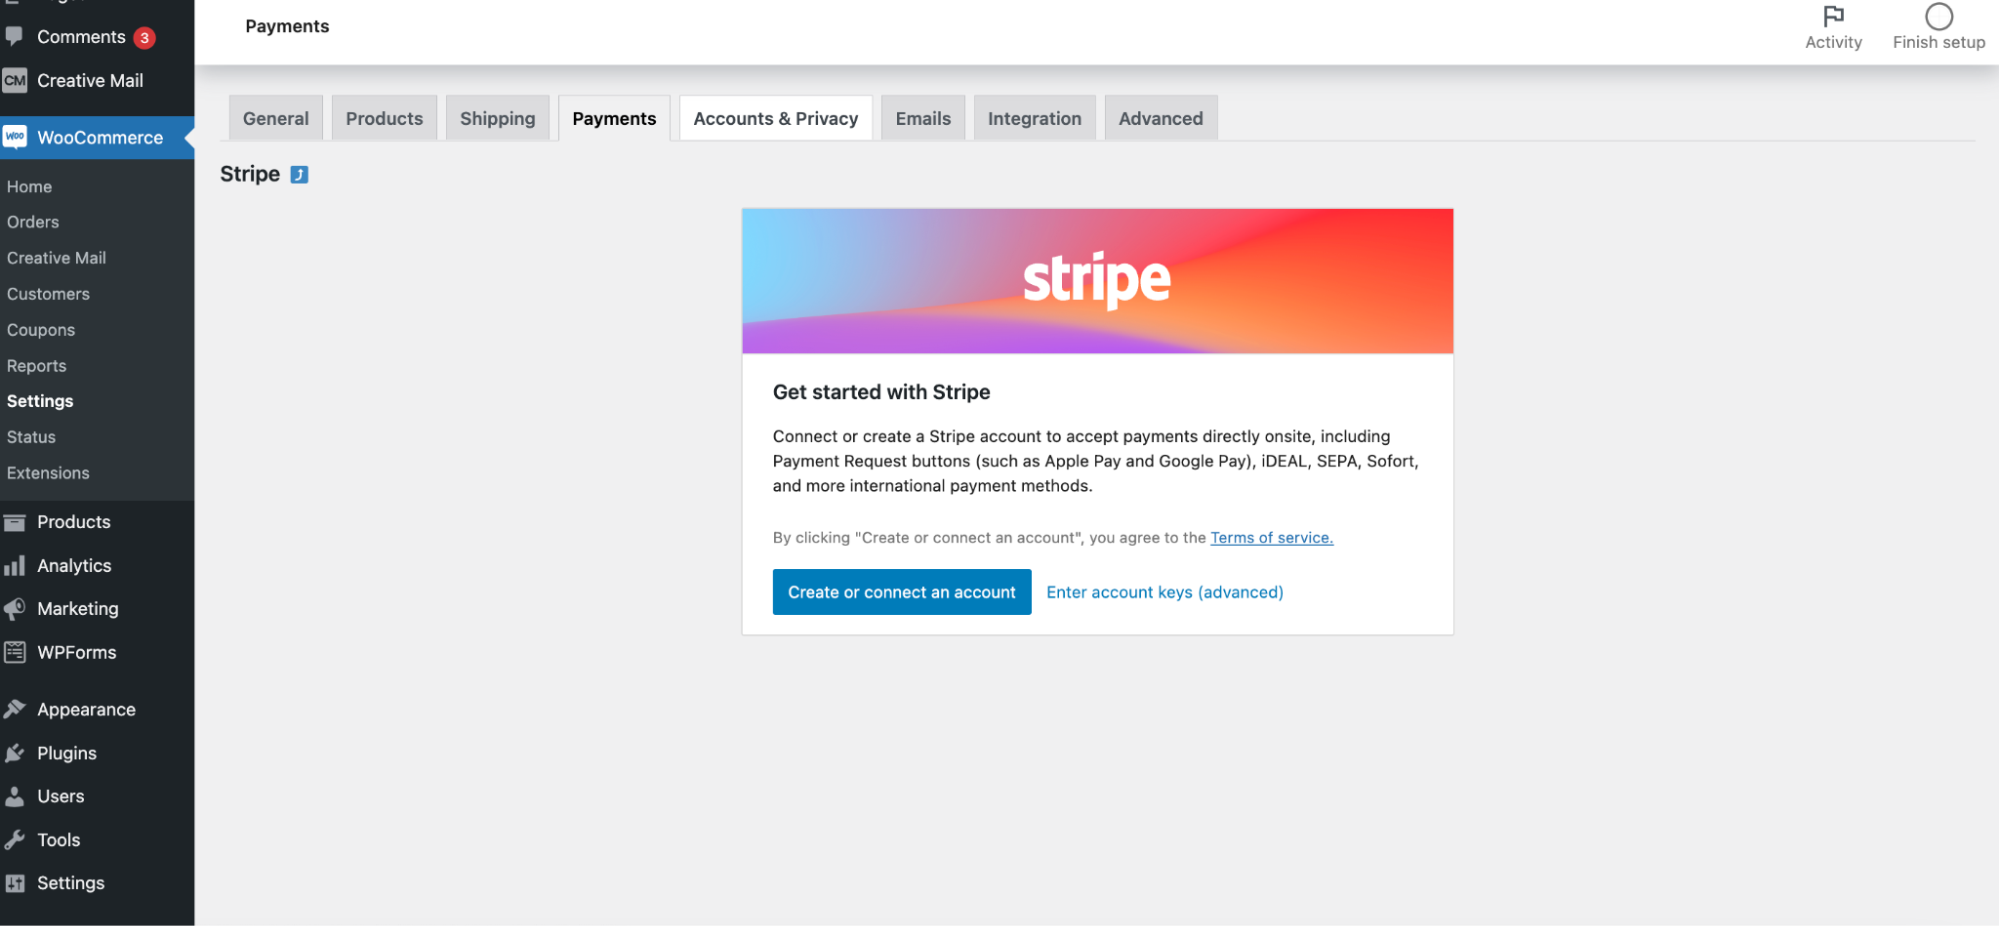
You can choose whether you want to connect your Stripe account or enter your account key.
Option 1: Connecting a Stripe account
Click on the blue Create or connect an account button to get started.
You will then be redirected to Stripe and see the page below where you will be asked to select the account you want to connect to WooCommerce.
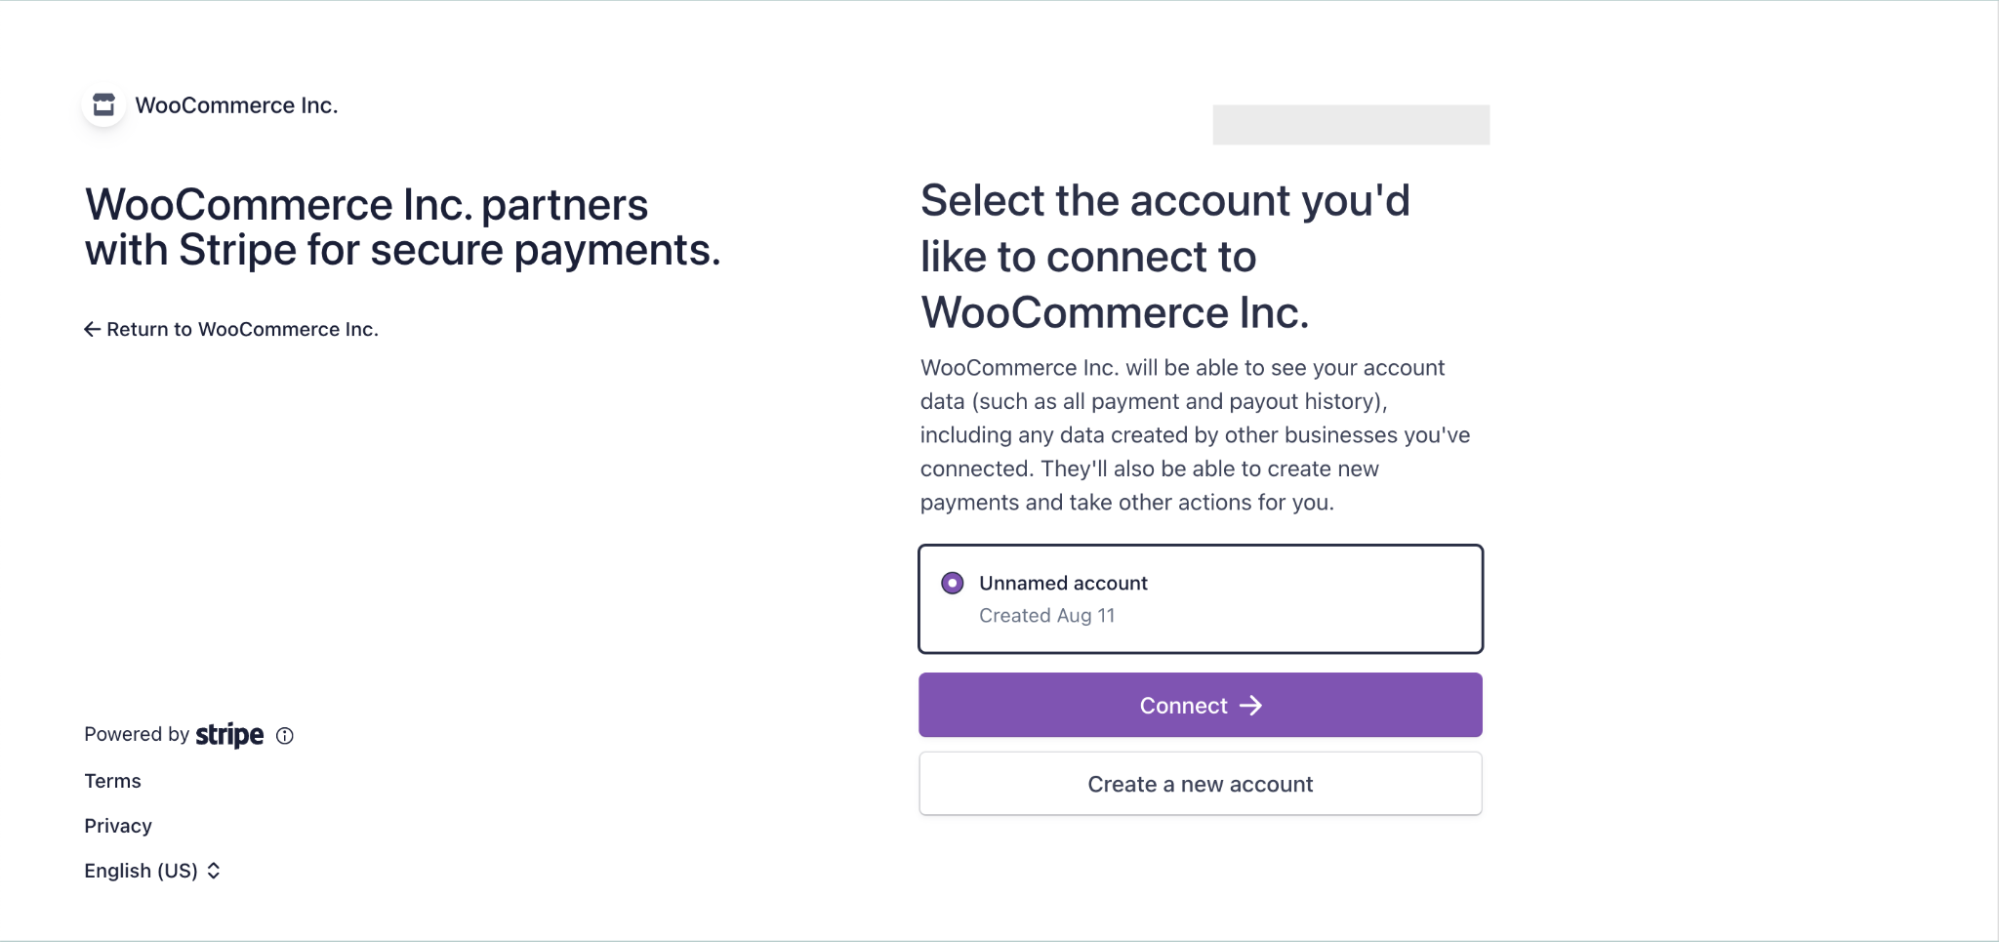
Once you have selected the account, it should be easy to set up if you have already saved your personal details. If not, enter your details until you have finished setting up the account.
Option 2: Entering live keys
Another way to set up your Stripe account is to manually enter the live account keys.
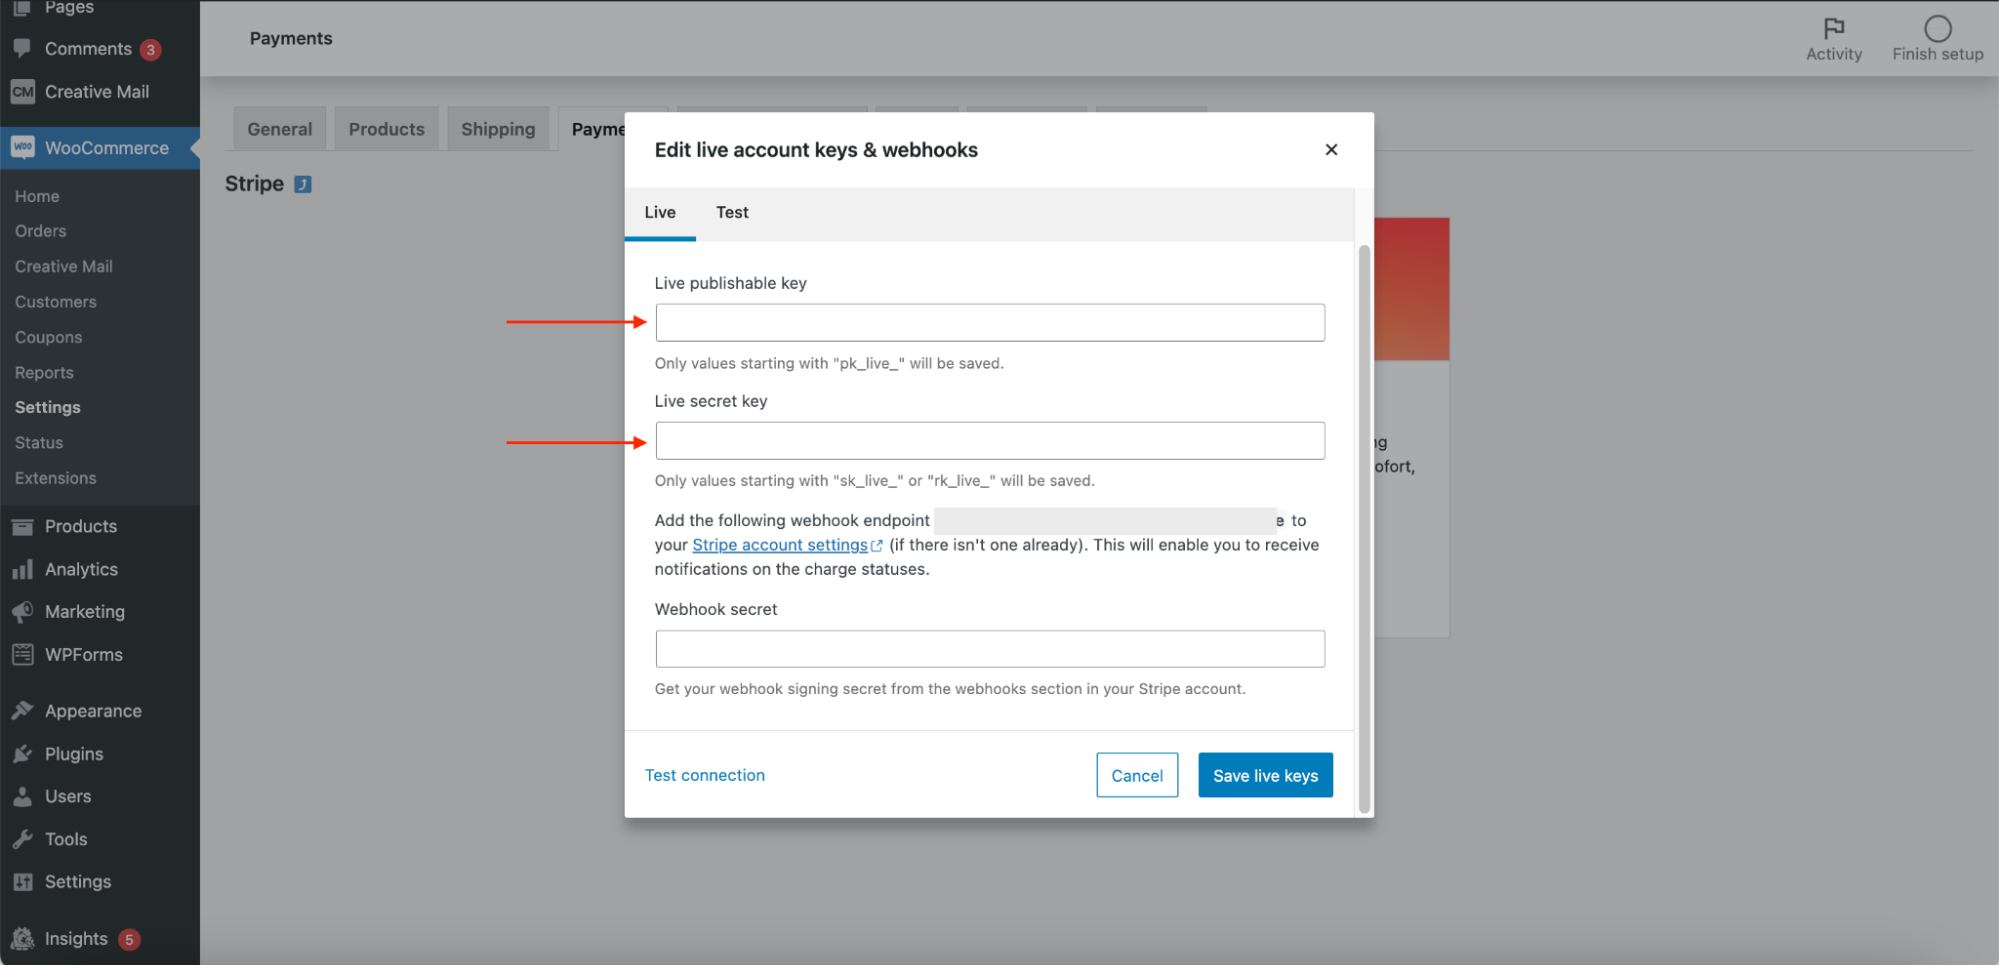
Do you remember the live key for publishing and the secret key that you copied in step 1? Paste these keys into the corresponding fields.
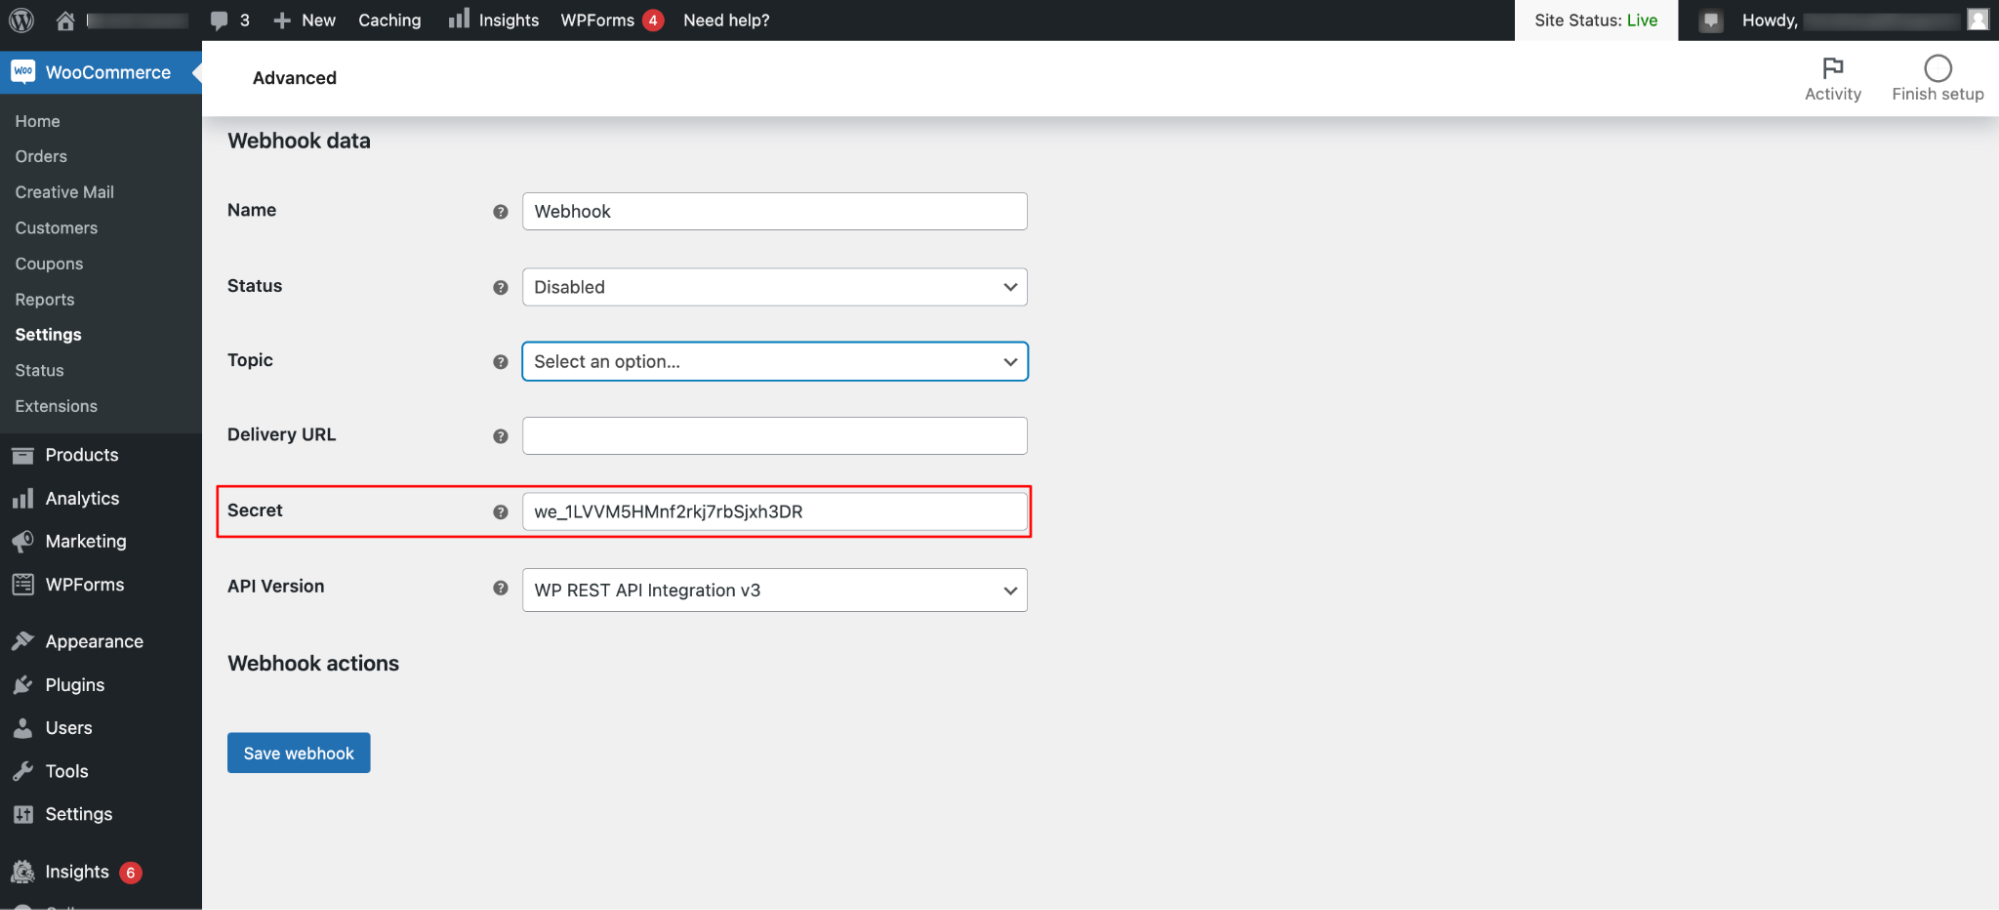
Then add the Webhook endpoint to your Stripe account settings so that you can receive notifications. You can find the webhook endpoint in the instruction field where you entered your API key.
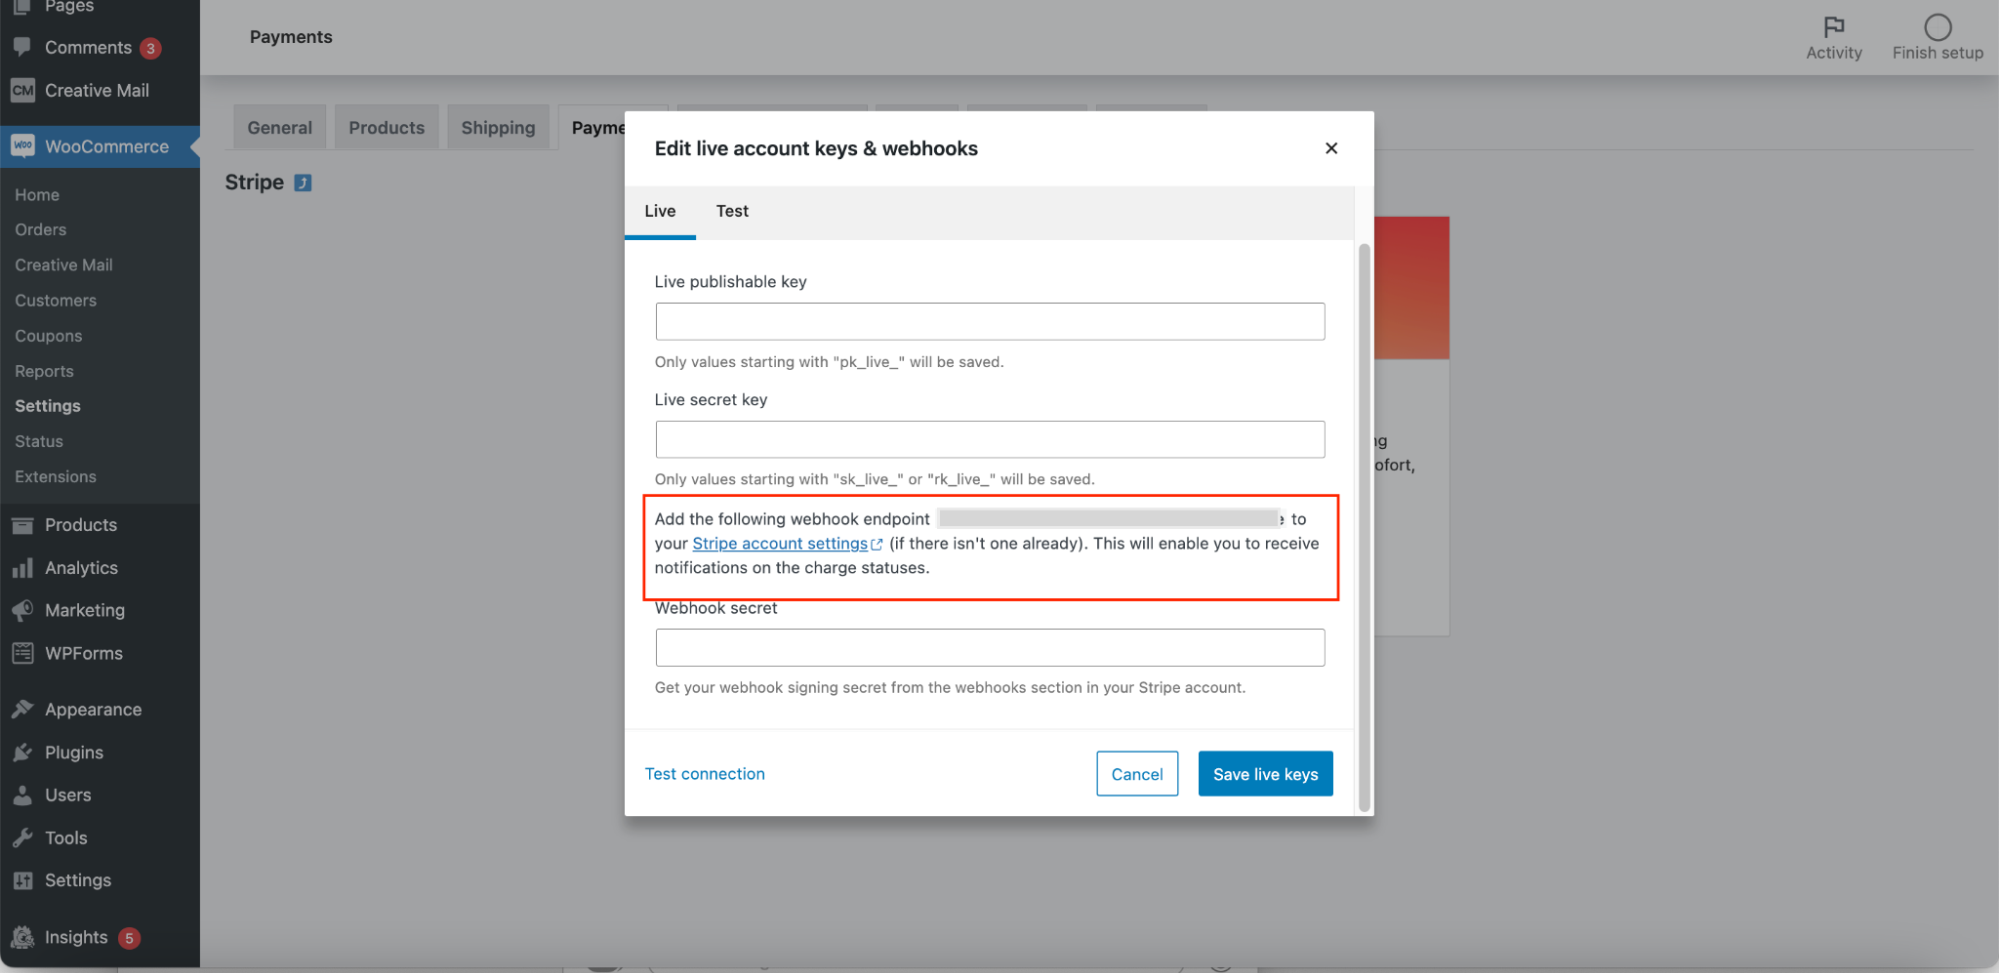
Click on the link to the Stripe Account Settings to be redirected to your Stripe account. Paste the webhook endpoint you copied into the Endpoint URL field on Stripe.
Select the events you want to include and click on Add Endpoint.

On the next page, copy the Webhook Signing Secretin the top right-hand corner.

Navigate back to WooCommerce Stripe Payment Gateway > Settings.
Go to Advanced settings > Webhook > Add webhook.
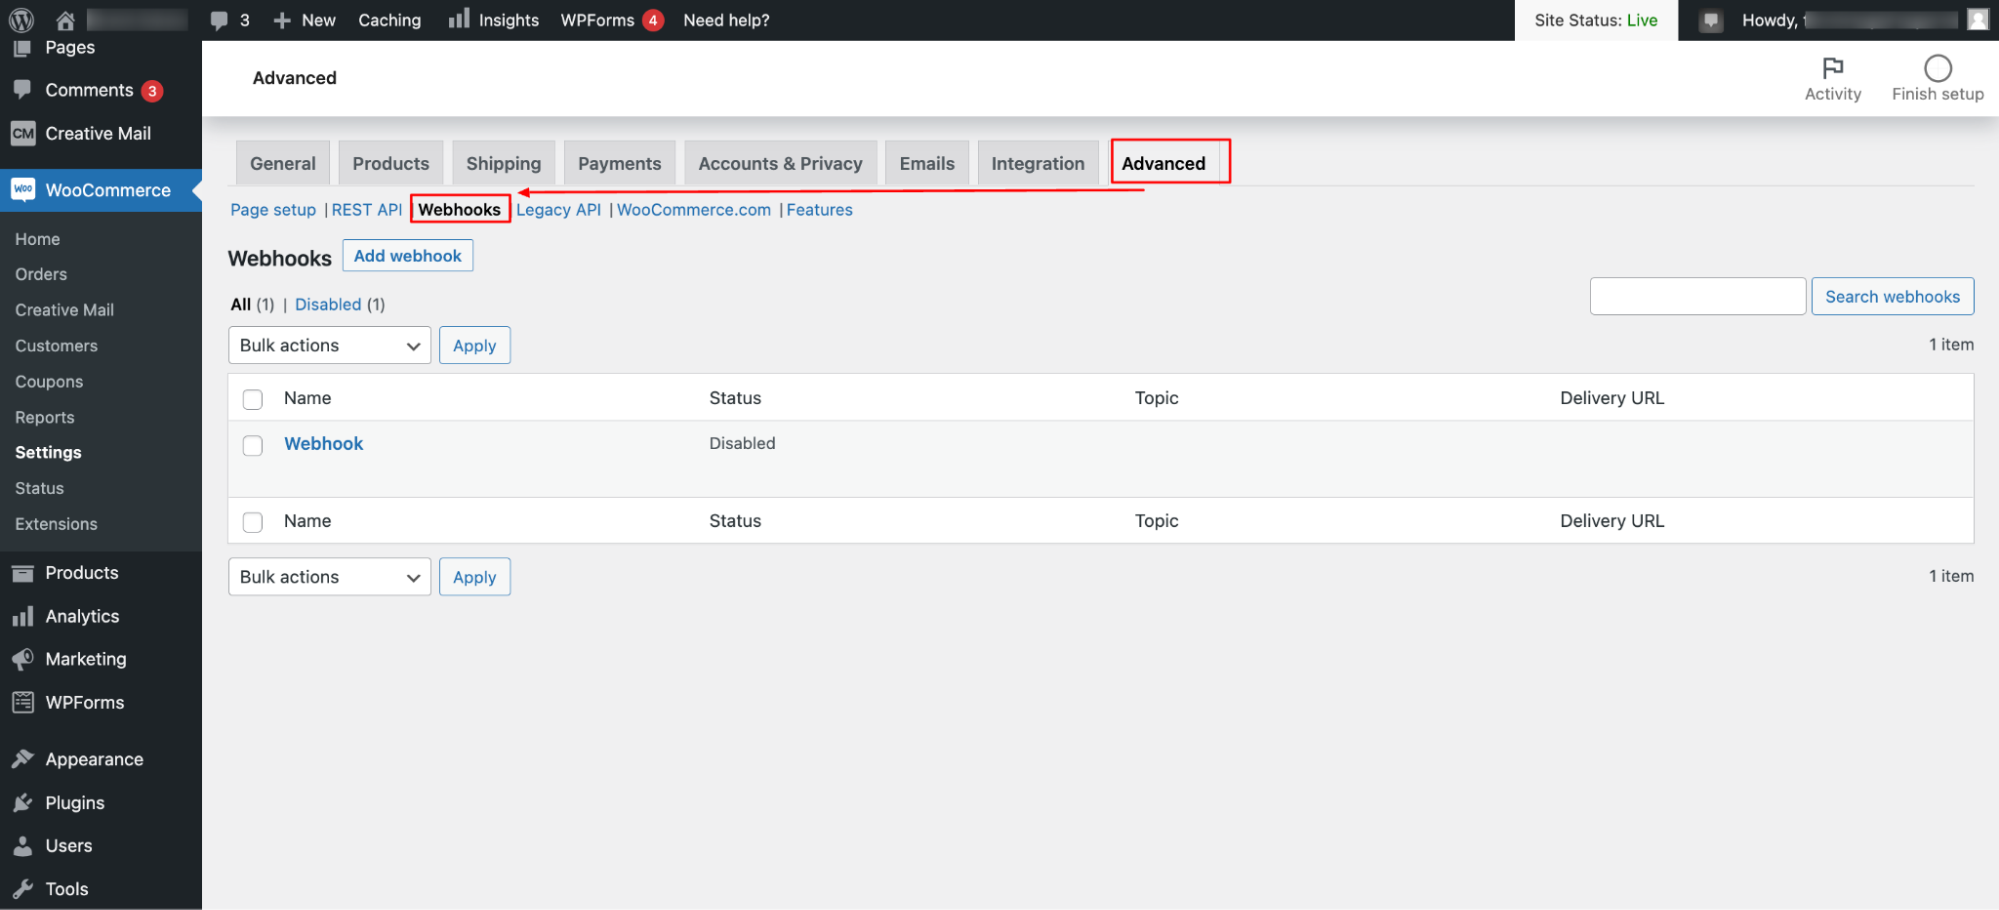
Add the Webhook Signing Secret to the settings of the WooCommerce Stripe plugin.
Click on Save changes to activate the new payment gateway in test mode.
4. test whether Stripe works
The Stripe payment gateway plugin works in two modes – test mode and live mode:
In test mode, you can carry out transactions without a credit card.
In live mode, you are ready to carry out actual transactions.
Add a product from your WooCommerce shopping basket in test mode and proceed to checkout.
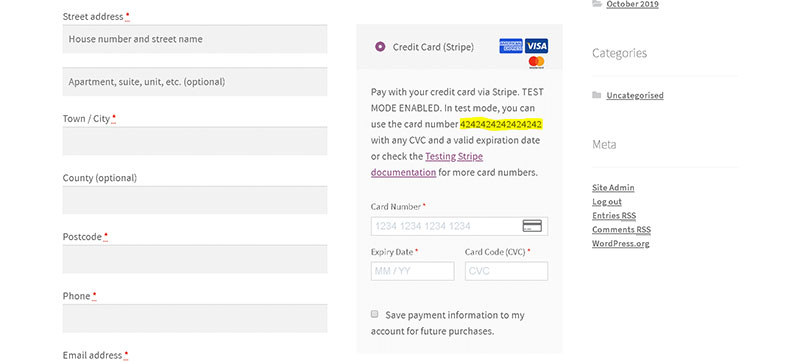
At the bottom of the checkout page, you will see that you are in test mode. The plugin gives you a fake credit card number to test the functionality.
After you have paid for the product with the fake credit card number, WooCommerce should show you a receipt to confirm that your order has been placed.
Other Stripe for WooCommerce plugins that you should consider
In addition to WooCommerce Stripe Payment Gateway, you can also find other Stripe plugins:
- The WordPress plugin directory
- CodeCanyon
- GitHub
Here are some outstanding Stripe plugins you should consider:
Payment plugins for Stripe WooCommerce
With over 80,000 active installations, Payment Plugins for Stripe WooCommerce is another popular WooCommerce Stripe plugin. As an official partner of Stripe, it allows you to accept various payment methods, including credit cards, Google Pay, ApplePay, ACH, Afterpay and Klarna.
It also supports the functions of WooCommerce and the checkout on the product and shopping basket page to increase conversion rates.
Stripe Payments for WooCommerce by Checkout Plugins
If you need an easy and secure way to use Stripe on your e-commerce website, you should consider Stripe Payments For WooCommerce by Checkout plugins.
Developed by the Brainstorm family, Stripe Payments for WooCommerce is a secure solution trusted by more than 70,000 WooCommerce websites. It also enables online businesses to accept different payment methods.
In contrast to other plugins, Stripe for WooCommerce offers a one-click checkout and a recovery function for cancelled shopping carts.
Accept Stripe payments
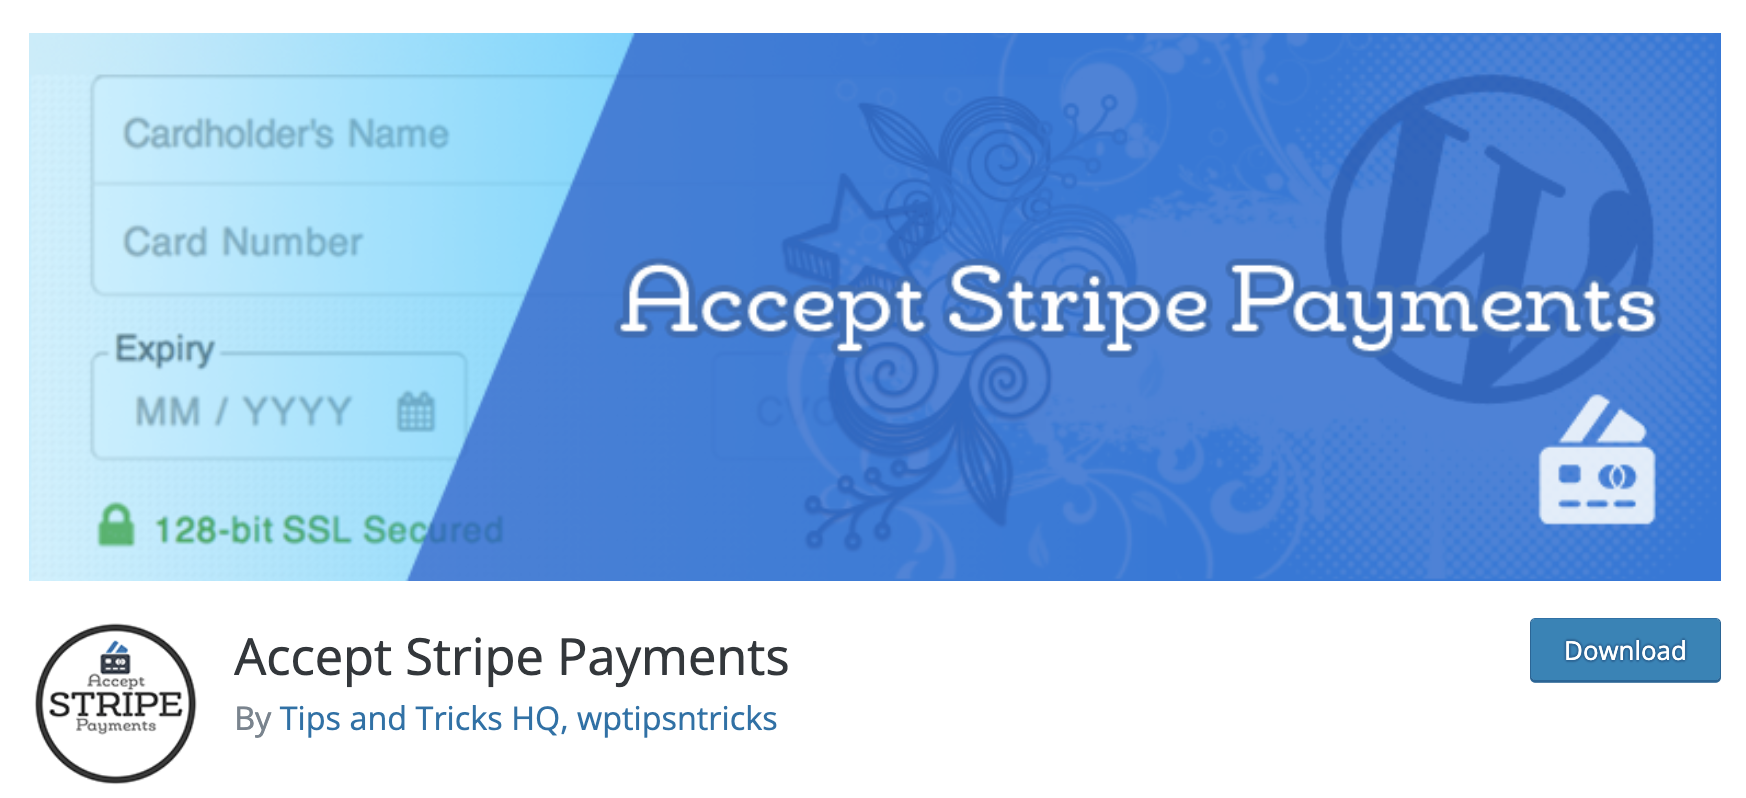
The Accept Stripe Payments plugin lives up to its name and makes it possible to accept payments and donations via Stripe. The plugin is responsive and therefore adapts to any screen. In addition, you can place and edit Stripe“Buy Now” buttons anywhere on your website.
Conclusion: How to set up Stripe for WooCommerce
Stripe is one of the best payment platforms you can use for your WooCommerce shop.
The beginner- and developer-friendly solution Stripe for WooCommerce prevents purchase cancellations by offering multiple payment options. It is also easy to integrate with third-party software.
However, keep in mind that a powerful solution like Stripe deserves equally powerful hosting. The WooCommerce hosting package from Raidboxes offers your customers a fast and secure shopping experience.
Take a look at our offer today.
Do you have further questions?
We look forward to your comments and questions. For more insights on online marketing, ecommerce and WordPress, follow Raidboxes on Facebook or LinkedIn – or subscribe to our newsletter.
Leave a Reply